
GPT Image 2.5 Flare vs Sunburst: 3 Editing Tests and Pricing
For gpt image 2.5 flare vs sunburst, start with Flare when fast everyday image generation is your priority. Start with Sunburst when precise image editing matters most. In the pricing screenshots reviewed for this article, both models have the same listed price per output image at every tier.
We tested three edits with the same inputs and prompts: a product background swap, a mug recolor, and an outfit change. Flare finished sooner in these individual runs, while the visual results were often close. The examples below let you inspect the actual outputs rather than infer quality from the model descriptions.
This comparison combines OpenAI model documentation, pricing, and six actual outputs generated on September 10, 2026. It is a small case study with one run per model per task, not a statistically reliable benchmark. Check current prices and applicable conditions on the linked model pages before use.
Choose a section:
- Flare vs Sunburst at a glance
- pricing by tier
- Three actual editing examples
- When to start with Flare
- When to start with Sunburst
- Compare cost per usable image
- Frequently asked questions
Flare vs Sunburst at a glance
The key distinction is the workflow each model emphasizes. Both accept text and image inputs and produce images. Image editing is not exclusive to Sunburst, and text-to-image generation is not exclusive to Flare.
| Dimension | GPT Image 2.5 Flare | GPT Image 2.5 Sunburst |
|---|---|---|
| Official positioning | Fast, high-quality everyday image generation | Most capable image model, with an emphasis on editing precision |
| Inputs | Text and images | Text and images |
| Output | Images | Images |
| Quality options | low, medium, high, xhigh, max, auto | low, medium, high, xhigh, max, auto |
| Direct OpenAI access | Image API or the Responses API image generation tool | Image API or the Responses API image generation tool |
| Suggested starting task | Explore compositions and create everyday visuals | Make specific changes while checking preserved details |
The capability rows come from the Flare documentation and Sunburst documentation. The suggested tasks are recommendations based on those descriptions, rather than measured outcomes.
pricing by tier
The supplied screenshots list the following prices for both models. The 100-image column is a calculation for 100 output images, not a guarantee of 100 usable final assets.
| Model variant | Flare per output | Sunburst per output | 100 outputs with either model |
|---|---|---|---|
| low | $0.012 | $0.012 | $1.20 |
| medium | $0.047 | $0.047 | $4.70 |
| high | $0.128 | $0.128 | $12.80 |
| xhigh | $0.25 | $0.25 | $25.00 |
| max | $0.50 | $0.50 | $50.00 |
| auto | $0.25 | $0.25 | $25.00 |
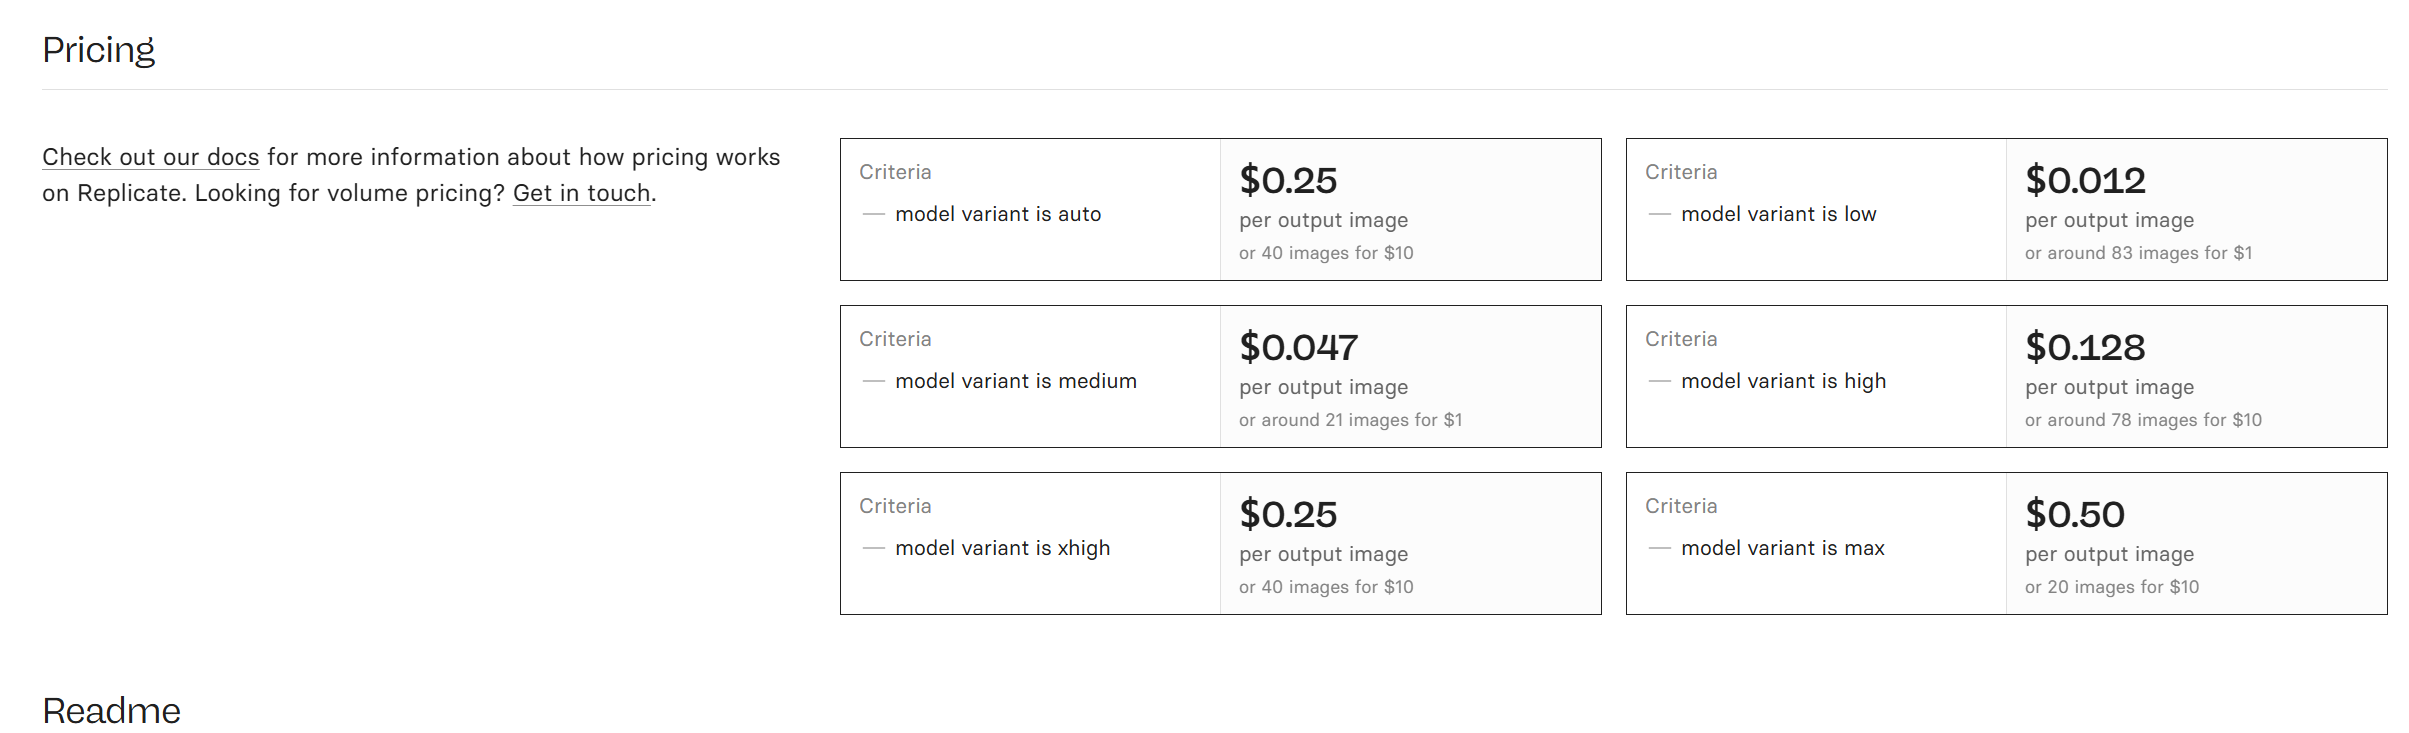
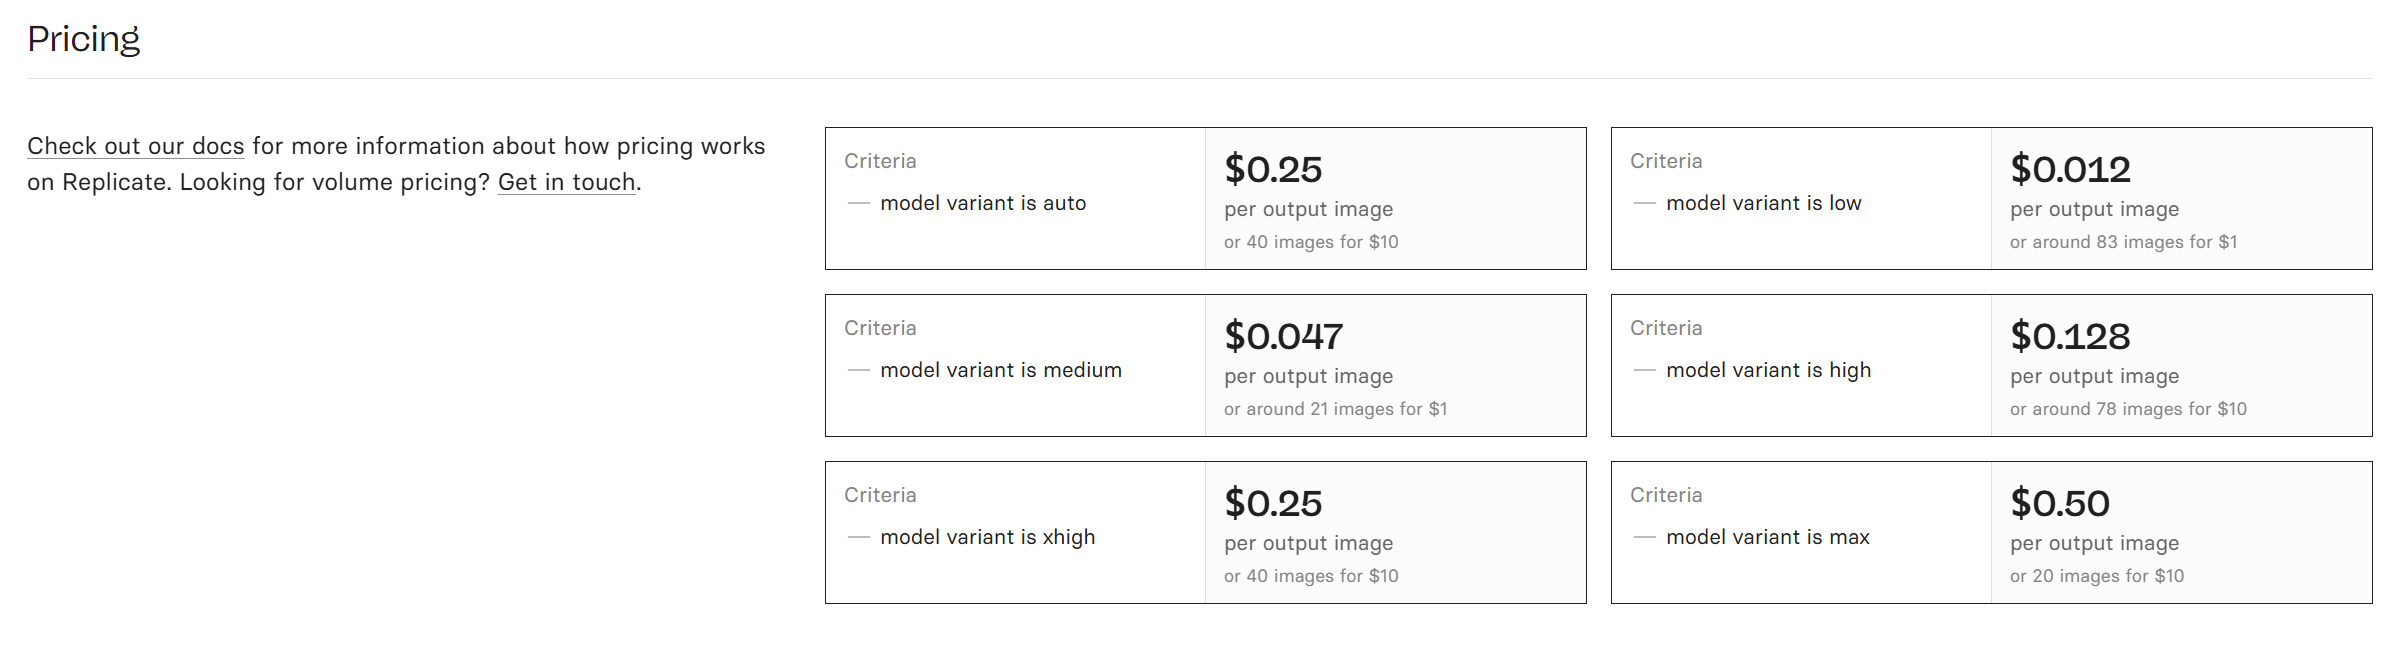
Two details matter when estimating a budget. First, auto and xhigh have the same listed price, but this does not prove they use identical settings or produce identical quality. Second, the screenshots do not show every applicable condition, such as any size-dependent rules. Treat the table as a dated pricing reference.
Keep this platform comparison separate from direct OpenAI API billing. OpenAI's model pages describe token-based rates; these per-image prices should not be presented as OpenAI's direct API per-image charges.
Three actual editing examples
We ran three paired tasks using the explicitly selected openai/gpt-image-2.5-flare and openai/gpt-image-2.5-sunburst models. Each pair used the same source WebP and the same English prompt, with high quality, one output, WebP format, compression 90, and automatic background and moderation. No follow-up edits or selection from multiple outputs were used.
The product and mug runs used a 1:1 output setting and returned 1024 × 1024 images. The portrait runs used 3:4 and returned 1152 × 1536 images. The portrait source is approximately 4:5, so some framing change is expected from the requested output ratio and should not be scored as a model-specific defect.
“Original” below means the input image reused from our prompt tutorial, not a claim of an unedited camera photograph. The exact displayed source WebP was supplied to both models. Results are shown individually, with only file-size compression applied where needed for publication. Source files, model outputs, prompts, prediction IDs, and checksums are retained in the article's run record.
| Task | Flare page time | Sunburst page time | What this pair lets you inspect |
|---|---|---|---|
| Product background replacement | 20.5 s | 30.7 s | Label readability, bottle shape, reflections, and shadow |
| Local mug recoloring | 22.7 s | 38.8 s | Blue finish, handle, coffee, and surrounding objects |
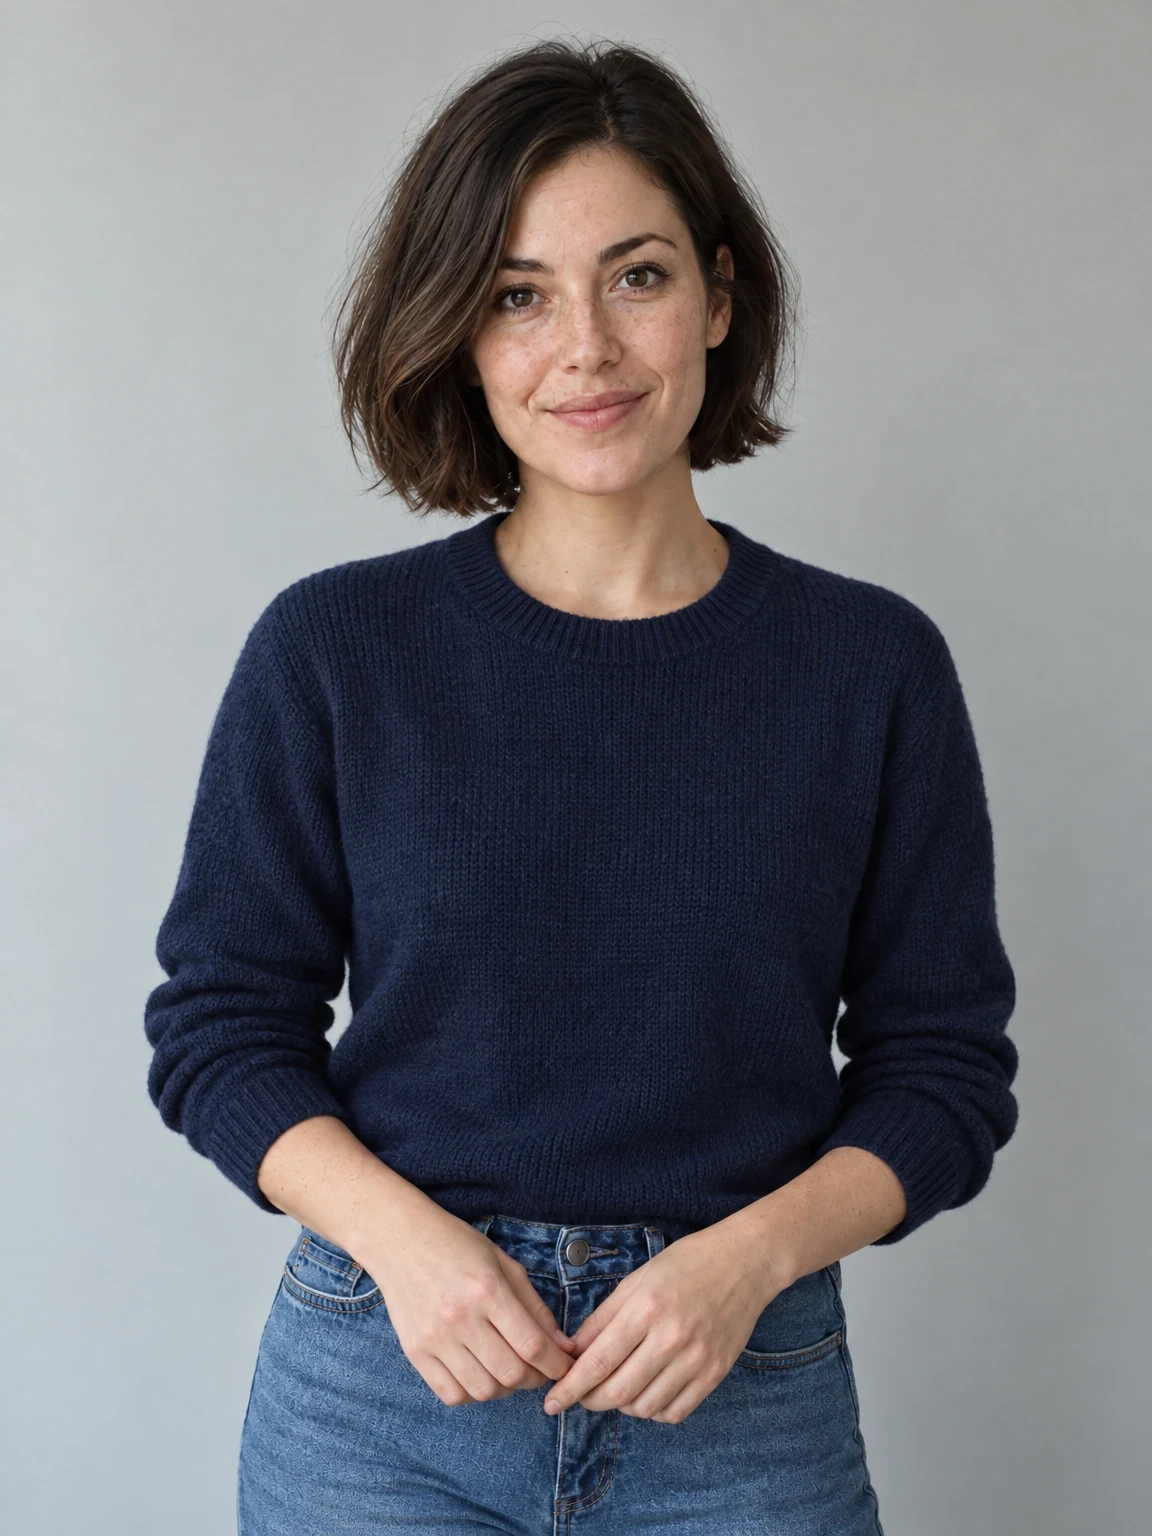
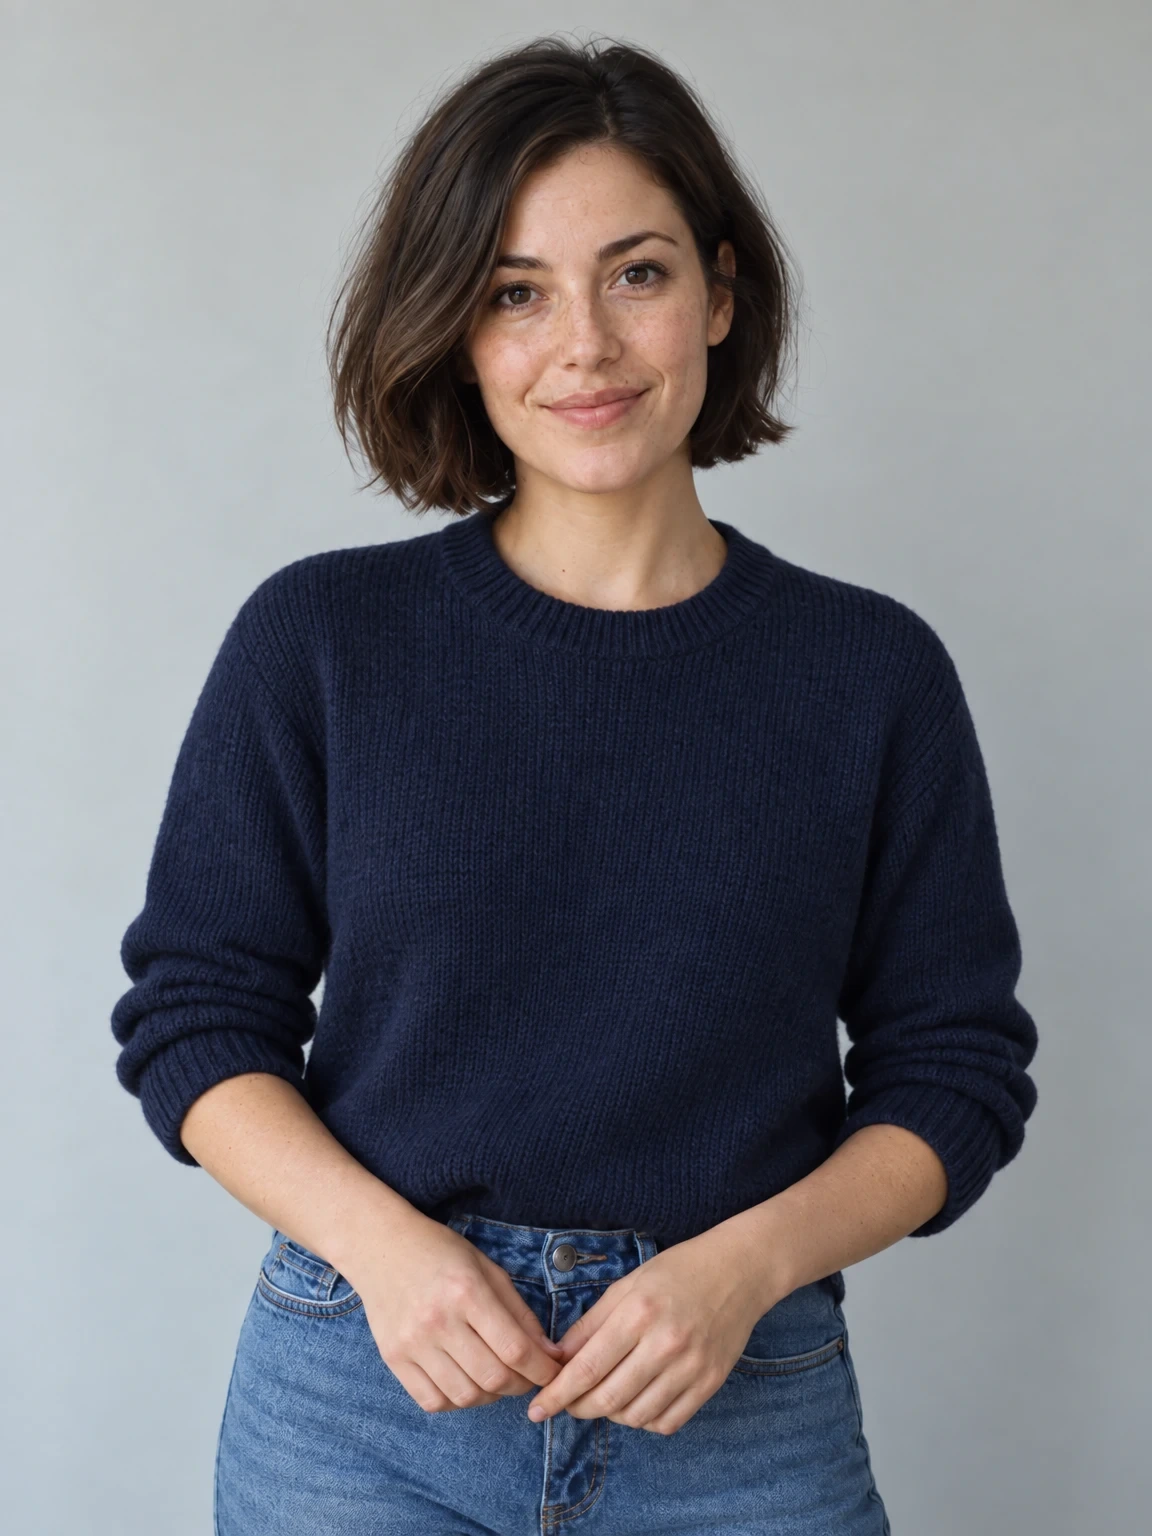
| Portrait outfit replacement | 19.7 s | 29.4 s | Sweater texture, face details, hands, and sleeve boundaries |
These are the individual “Generated in” times displayed, not repeated measurements or a guaranteed latency advantage. Flare finished sooner in these three runs. The sample is too small to establish general success rates or a universal quality winner. At the listed high-tier price, six outputs amount to $0.768; this is a price-table estimate, not a verified final invoice.
Case 1 — Replace a product background while retaining the label
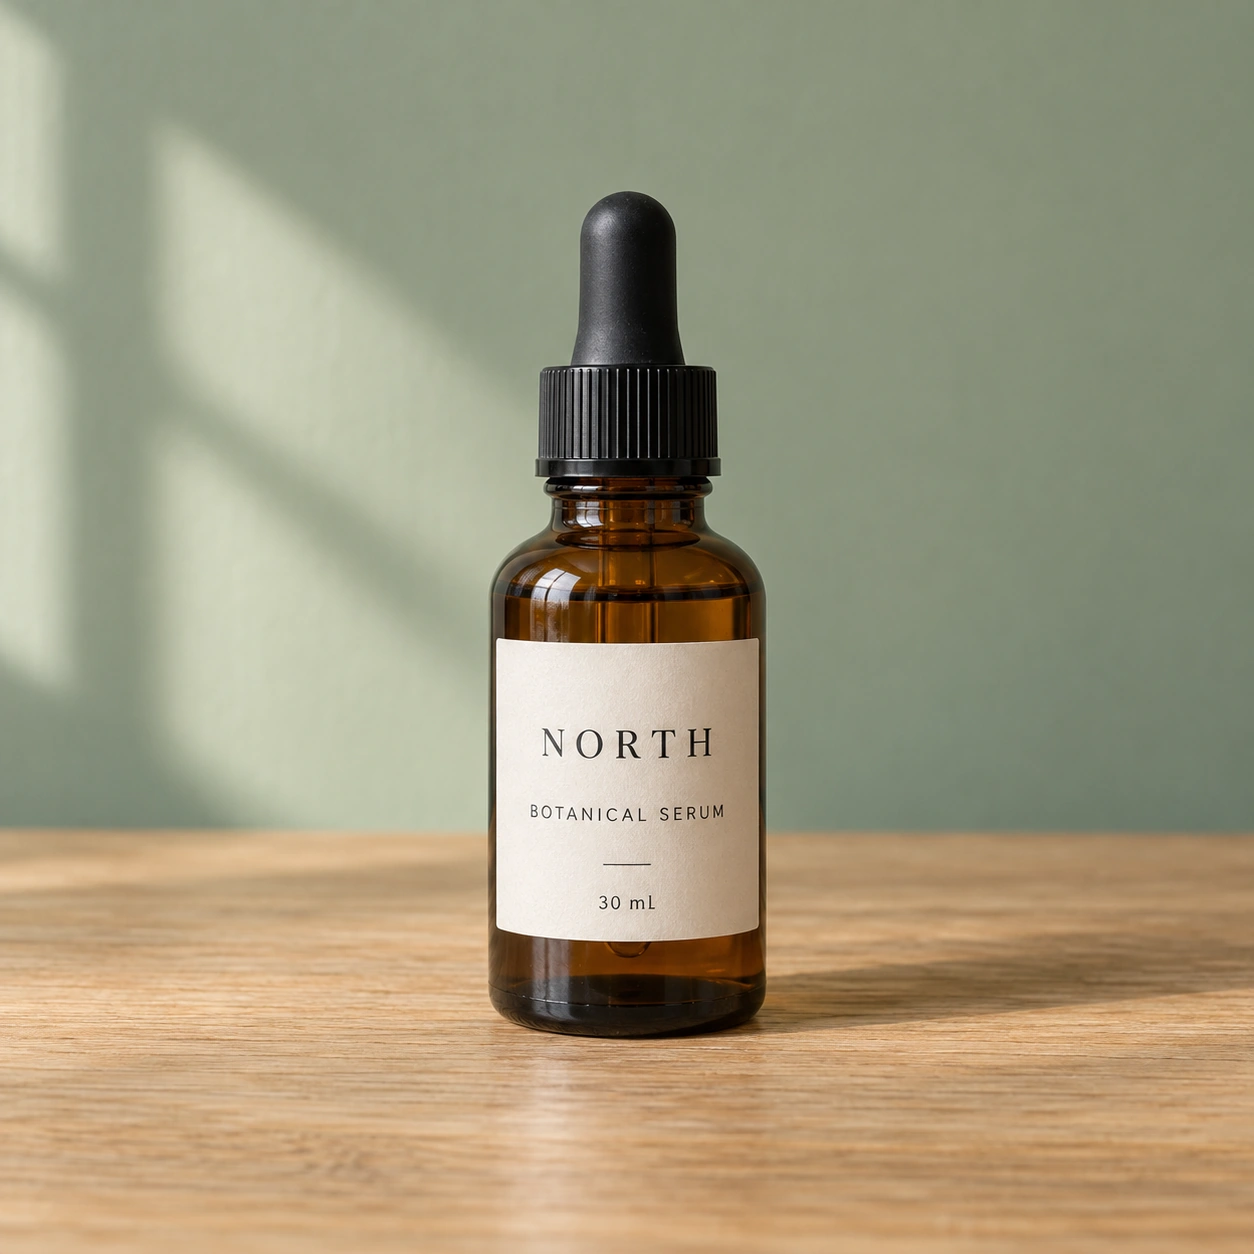
Move the amber serum bottle from a wooden tabletop and green wall into a pale gray studio setup. The label text and product geometry are the main checks.
Original
Flare result
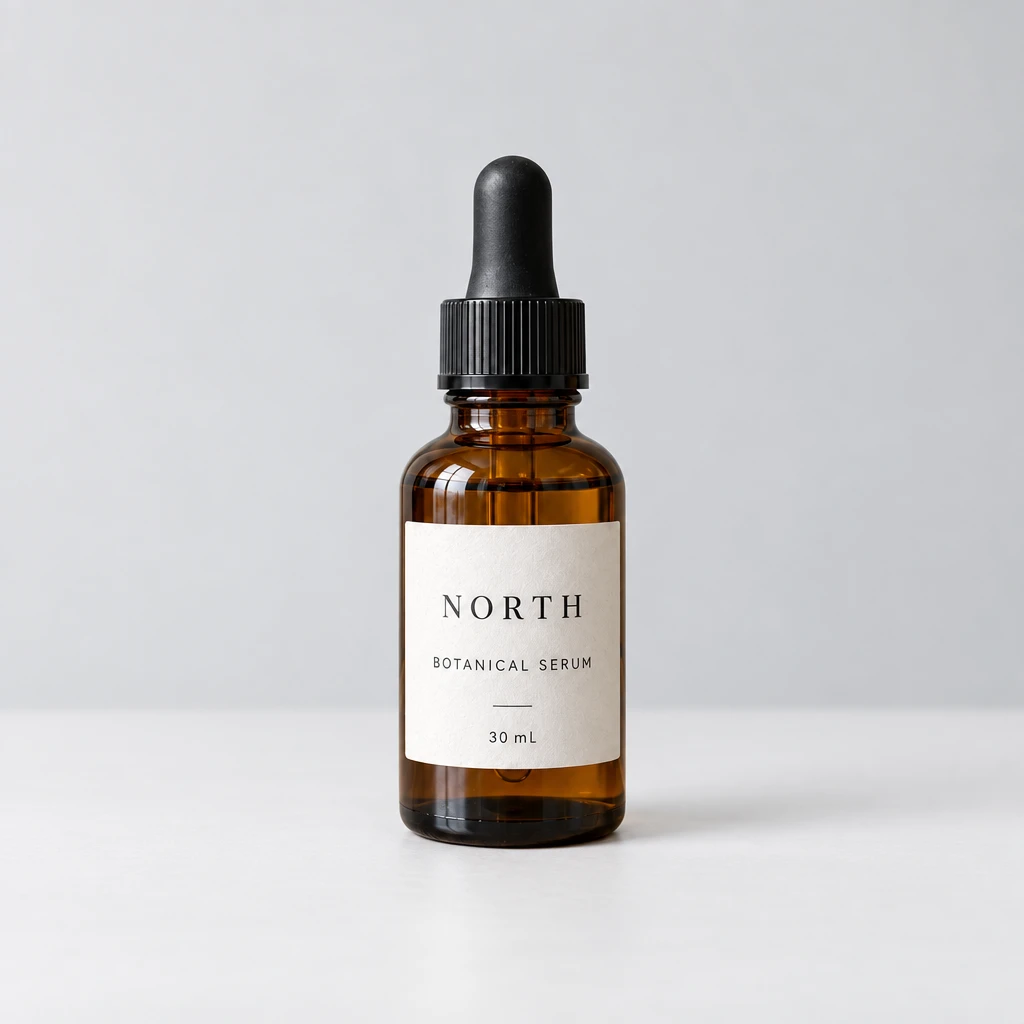
Sunburst result
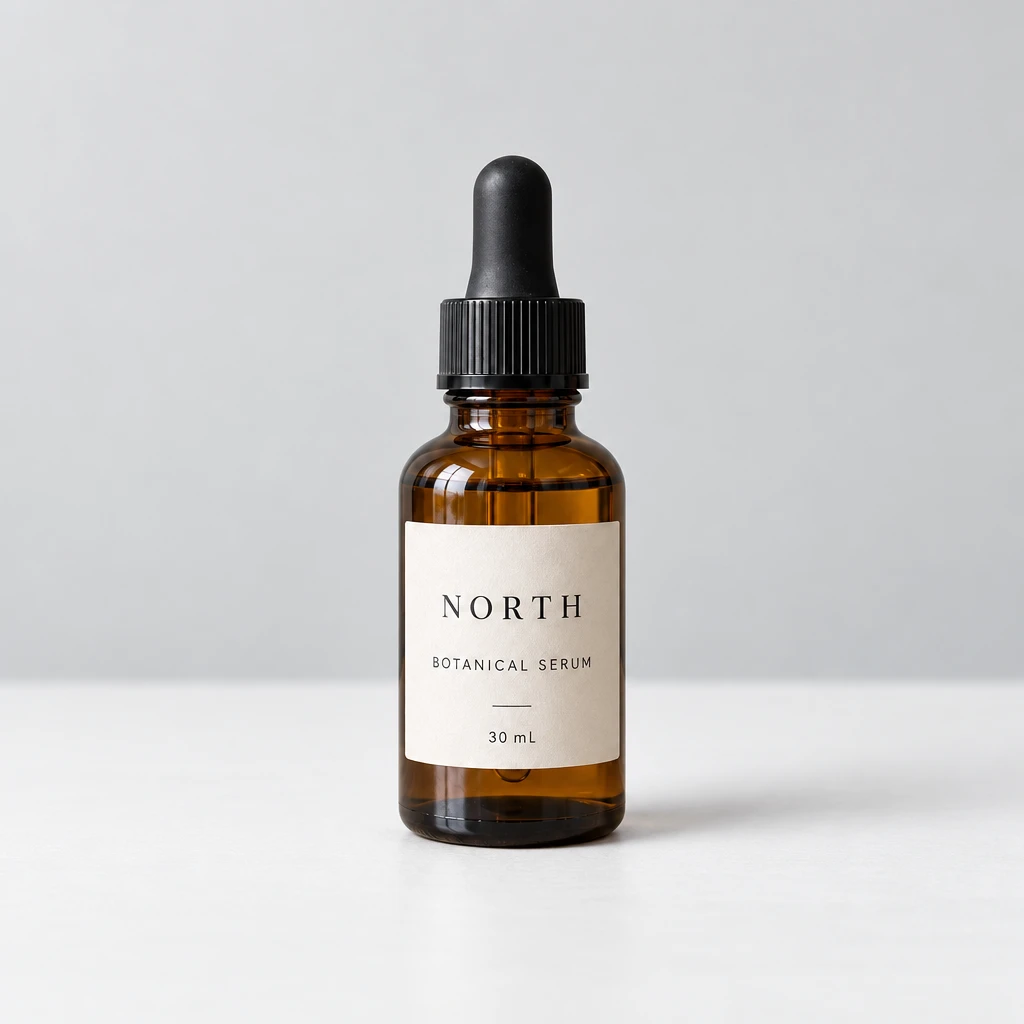
Exact prompt used for both models
Replace the background and tabletop with a clean pale gray studio background and matte white surface. Preserve the exact bottle shape, amber glass, black dropper, label, all text including NORTH, BOTANICAL SERUM and 30 mL, and the bottle position and size. Add a realistic soft contact shadow. Do not add objects or text. Keep the original aspect ratio.What the outputs show: Both outputs replace the setting with a pale gray background and white surface, keep the black dropper and amber bottle recognizable, and retain readable NORTH, BOTANICAL SERUM, and 30 mL text. At this viewing scale, the two results are very close; this pair does not support a strong editing-quality winner. Reflections and contact shadows have been regenerated, so retaining the product’s appearance should not be confused with preserving its original pixels.
Practical takeaway: For a straightforward studio-background swap, both outputs are useful candidates for review. Inspect small packaging text at full size before using either in a product listing.
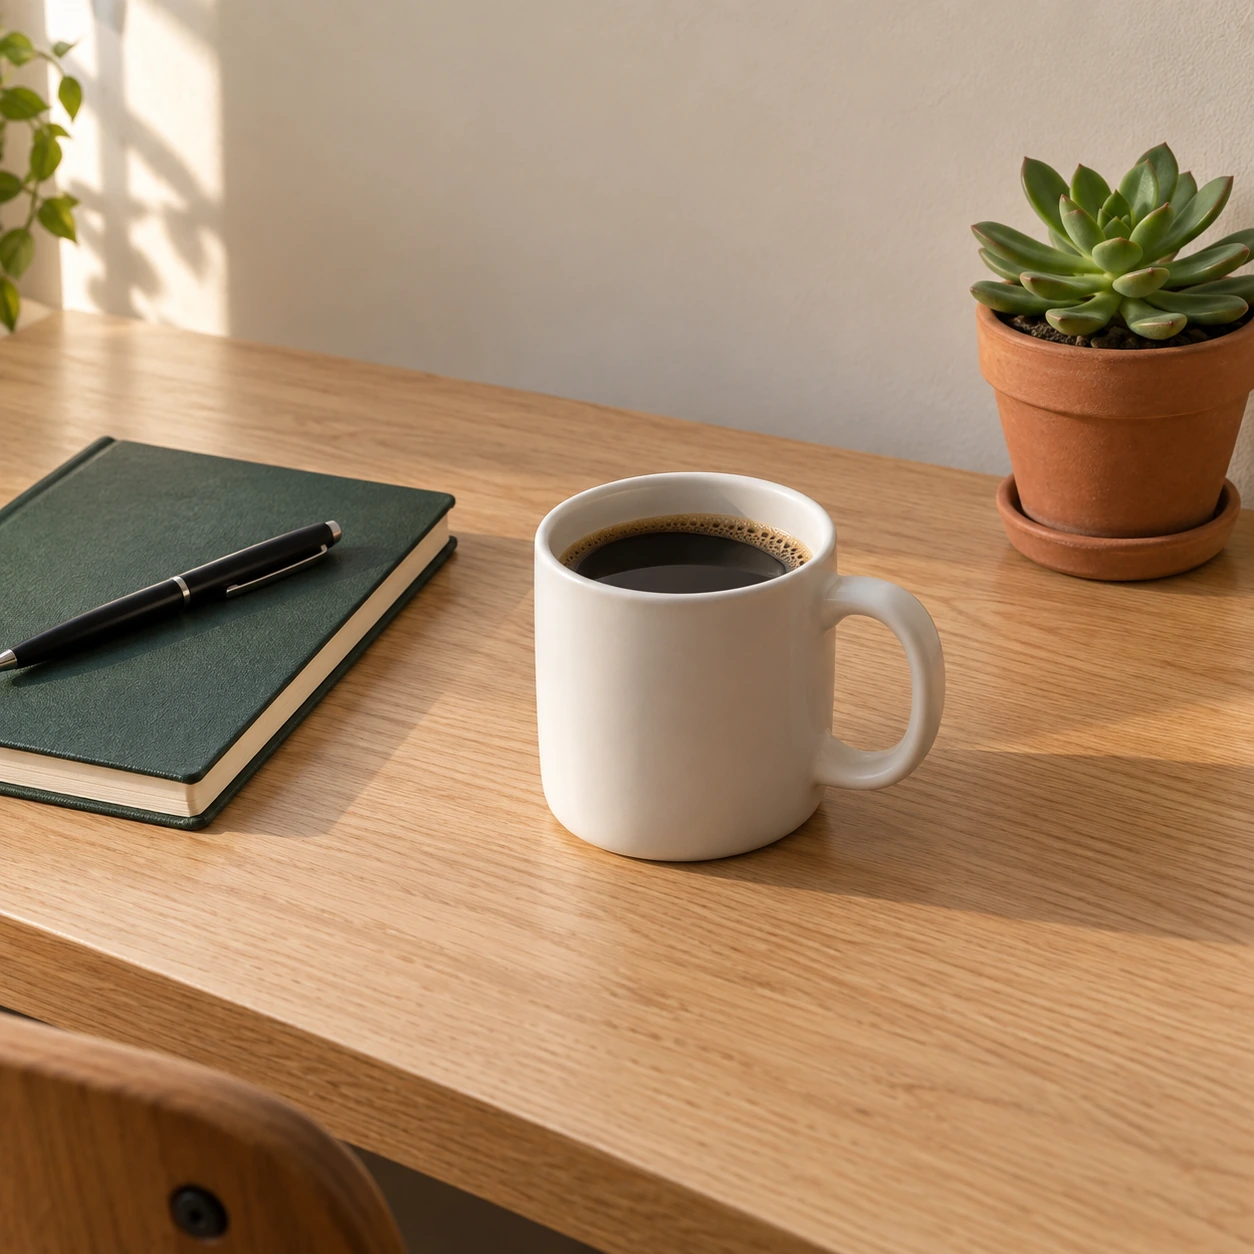
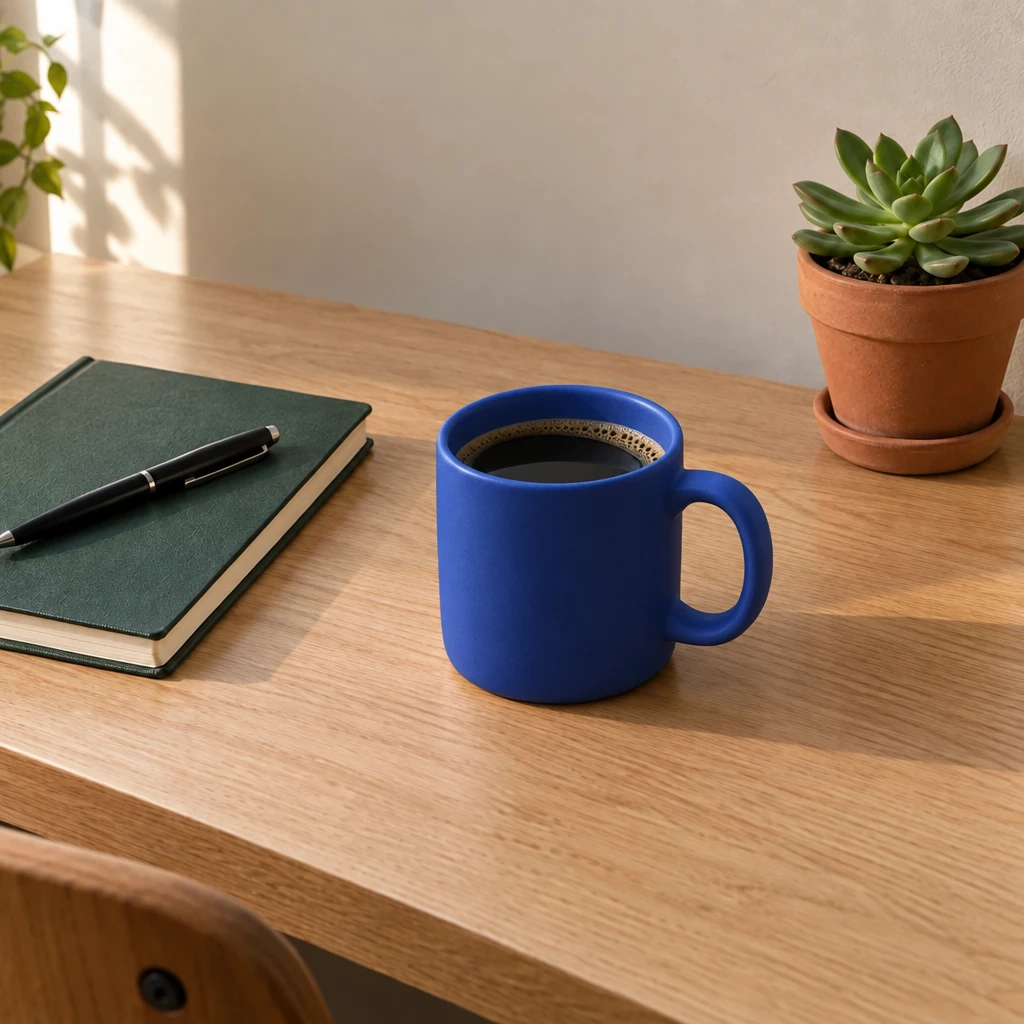
Case 2 — Change only the coffee mug color
Change the white mug to matte cobalt blue while keeping the notebook, pen, plants, coffee, and room arrangement intact.
Original
Flare result
Sunburst result
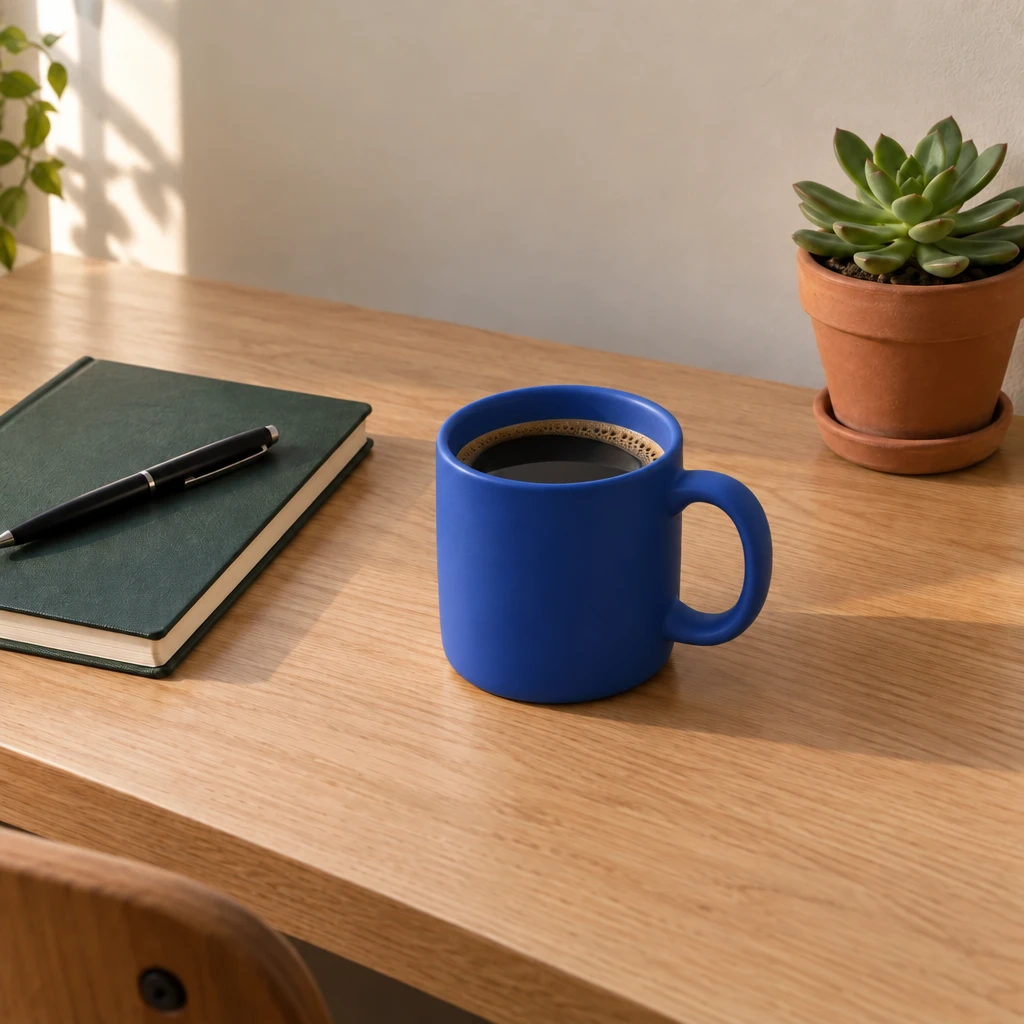
Exact prompt used for both models
Change only the white ceramic coffee mug to matte cobalt blue. Preserve its shape, handle, position, coffee, reflections appropriate to the new material, and contact shadow. Keep the notebook, pen, plants, table grain, wall, lighting, framing and all other objects unchanged. Keep the original aspect ratio.What the outputs show: Both models produce a blue mug with coffee and a visible handle, while the green notebook, black pen, succulent, and warm desk lighting remain recognizable. The images are close at article size. The requested color change is easy to spot; exact preservation of the wall texture, wood grain, and small object boundaries would require a pixel-level comparison, which this visual review does not claim.
Practical takeaway: Review non-target objects as well as the blue mug. A successful recolor alone is not enough if your workflow requires an exact match elsewhere in the image.
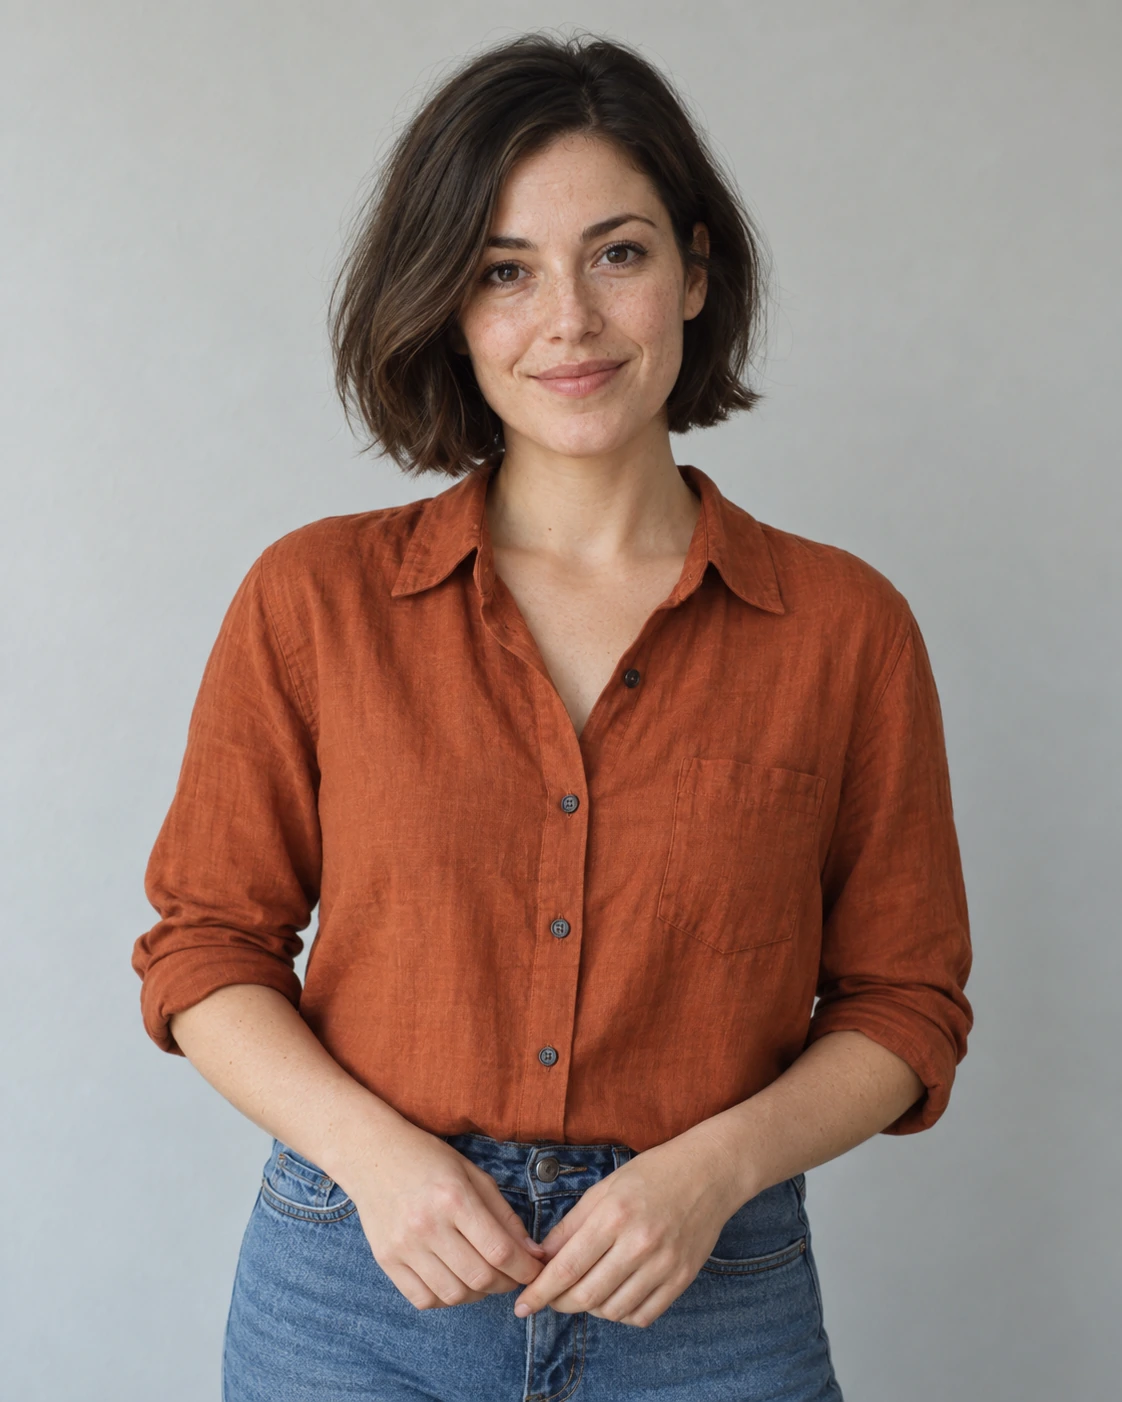
Case 3 — Replace a shirt with a knitted sweater
Replace the rust-colored shirt with a navy crew-neck sweater while keeping the portrait’s face details, pose, hands, jeans, and background recognizable.
Original
Flare result
Sunburst result
Exact prompt used for both models
Replace only the rust-colored shirt with a navy blue knitted crew-neck sweater. Preserve the same person, facial features, freckles, hairstyle, expression, pose, hands, jeans, background, lighting and framing. Make the sweater folds and sleeve boundaries natural. Do not retouch the face. Output a 3:4 portrait image; keep the subject fully within the frame.What the outputs show: Both outputs replace the buttoned shirt with a navy crew-neck knit and retain the short bob, visible freckles, hands, jeans, and plain background. The sweater folds and sleeve bunching differ between the two outputs. Faces remain visually similar to the input, but this is not an identity-verification test. The source and requested output have different aspect ratios, so compare garment boundaries and facial details without treating the framing adjustment itself as a failure.
Practical takeaway: Choose between these outputs by garment fit and sleeve or hand boundaries, not by assuming the model name guarantees better portrait preservation. For stricter work, inspect aligned face crops and rerun across several inputs.
When to start with Flare
Flare is a reasonable first candidate when you need to explore several visual directions quickly: a blog illustration, a social post concept, or a thumbnail composition with space for a title. Its official emphasis on everyday generation and speed fits this kind of iterative work.
Define acceptance criteria before generating. For a blog cover, that might mean one recognizable subject, enough negative space for the headline, and no unwanted lettering. A visually attractive result is still unsuitable if the subject is cropped or the layout leaves nowhere to place the title.
Start from a concrete example in our GPT Image 2.5 prompts guide, especially the product-background, poster, or video-thumbnail tasks. Keep the same prompt when comparing models so that a wording change does not explain the difference.
Those prompt examples are useful test inputs, but their images are not verified Flare or Sunburst benchmark results. Use your selected model and record its exact ID when running your own comparison.
When to start with Sunburst
Sunburst is a reasonable first candidate when a specific change must coexist with strict preservation requirements. Examples include changing a product's color while retaining its label, replacing a short line of text, or changing a background without altering the subject.
Judge the requested edit and the preserved areas separately. For a product-color edit, inspect the new color, label text, outline, material, lighting, and shadow. Completing the color change does not compensate for a distorted logo or changed product geometry.
The local-edit prompt example gives you a structure for naming both the change and what must remain intact. Replace its subject with your own image and requirements.
Choosing Sunburst first is a recommendation based on its official editing emphasis. It is not a promise that every edit will succeed, that text will always be exact, or that untouched pixels will remain identical.
Compare cost per usable image
Equal per-output prices do not settle total project cost. Attempts that fail your acceptance criteria can increase the expense of reaching a usable result. Evaluate that difference with a small, repeatable test.
- Fix the task and settings. Use the same source image, prompt, output size, and explicit quality tier. Record the platform, model ID or version, and test date. Avoid using auto when the goal is to compare a fixed tier.
- Write the pass criteria. For an edit, specify both the requested change and details to preserve. For a new image, specify composition, text, and output requirements.
- Repeat both models. Run several attempts under comparable conditions and keep unsuccessful results. Do not choose one attractive sample as the entire comparison.
- Record time and billing. Log completion time, billable outputs, accepted outputs, and actual charges. Compare median completion time rather than only the fastest attempt; platform queueing can affect elapsed time.
- Calculate usable-image cost. Divide total recorded spend by accepted images. If none pass, report that no usable image was obtained rather than assigning a zero cost.
Cost per usable image = total recorded spend / accepted imagesFor a hypothetical high-tier run, 100 outputs at $0.128 cost $12.80. If 80 pass review, the cost is $0.16 per usable image. If only 50 pass, it is $0.256. These are arithmetic examples, not measured acceptance rates for either model.
For deadlines, also track review and revision time. The model with the shorter generation time may not finish the whole job sooner if its outputs require more corrections. Conversely, a precise result may not justify extra waiting for a disposable concept sketch.
Compare both models with your own image: choose one task from the prompt examples, run it at a fixed tier, and keep the outputs alongside your pass criteria and billing record.
Frequently asked questions
Do Flare and Sunburst cost the same?
The screenshots supplied for this article show the same per-output-image price at each of six tiers. Check the current applicable conditions before budgeting a production run.
Which model should I try for everyday image generation?
Start with Flare if speed and repeated visual exploration are priorities. This follows its official positioning; confirm the actual time and quality on your task.
Which model should I try for precise edits?
Start with Sunburst when specific changes and preservation requirements dominate. Inspect both the edited area and details that should remain unchanged.
Can Flare edit existing images?
Yes. Flare accepts image inputs and supports editing. Sunburst's emphasis on editing precision does not make editing exclusive to that model.
Does auto mean xhigh?
The screenshots establish only that the two entries have the same listed price. They do not establish identical settings, behavior, or output quality.
Is the cheapest tier always the most economical choice?
No. A lower output price can be offset by more failed attempts. Compare actual spend per accepted image, and include review time when it affects your workflow.